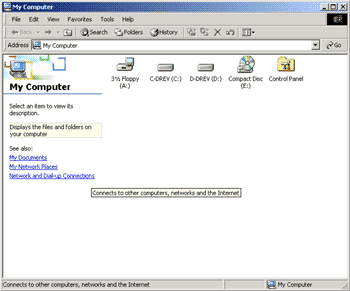
[Step 1:]
- From the Desktop , double click the My Computer icon
- Select the Network and Dial-Up Connections shortcut shown to the left
|
|
|
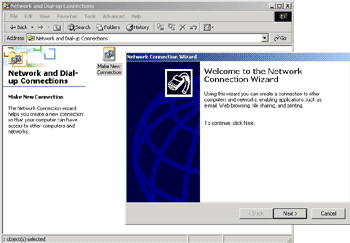
[Step 2:]
- The Network Connection Wizard will now start.
- Click Next
|
|
|
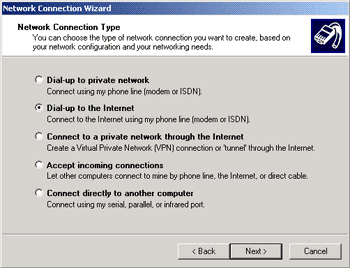
[Step 3:]
- Note: Make sure you have all the necessary information from your Internet Service Provider (ISP)
- In the Network Connection Type dialogue, select the Dial-up to the Internet option.
- Click Next
|
|
|
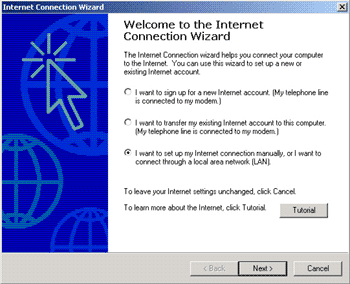
[Step 4:] The next step launches the Internet Connection Wizard
- Select "I want to set up my Internet connection manually"
- Click the Next button
|
|
|
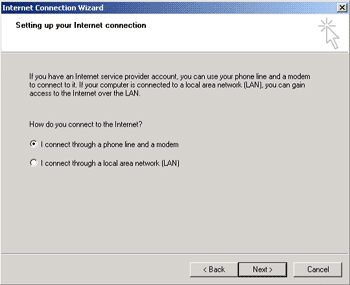
[Step 5:]
- Select "I connect through a phone line and a modem"
- Click Next
|
|
|
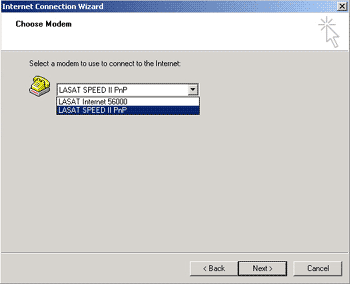
[Step 6:]
- Select the Modem you wish to connect with. If you have only one modem installed this will already be chosen - if not, simply click on the down arrow to see a list of installed modems.
- When you have made your choice, click the Next button
|
|
|
[Step 7:]
- Type the dial-in phone number in the Telephone Number field.
See Dialup Access Numbers.
- Click Next when you have typed in the phone number
|

|
|
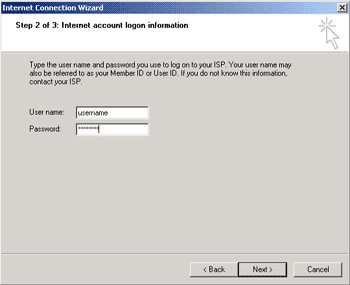
[Step 8:]
- Type in the User Name and Password in the appropriate fields.
Note : This information has been provided by your ISP, and if you do not have this please contact them.
- Click Next when you have typed the information into the fields
|
|
|
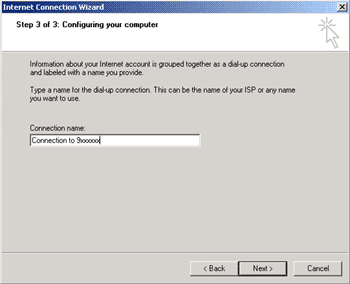
[Step 9:]
- Now you are asked to provide a Connection Name - this is simply the name you wish the connection to be known by. For ease of use, just choose your ISP name.
- Click Next to continue
|
|
|
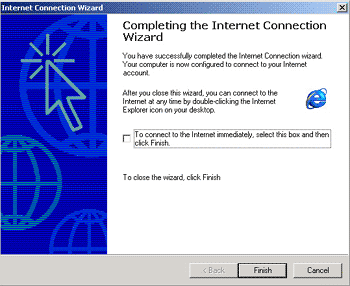
[Step 10:]
- Do not check the "To connect to the internet immediately.." box, as you have not quite finished setting up the connection yet.
- Click Finish
|
|
|
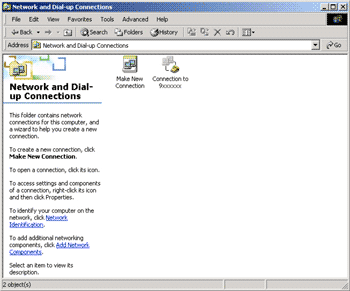
[Step 11:]
- In the Network and Dial-up Connections panel, a new icon will now have appeared which will have the name you gave your connection in Step 9.
|
|
|
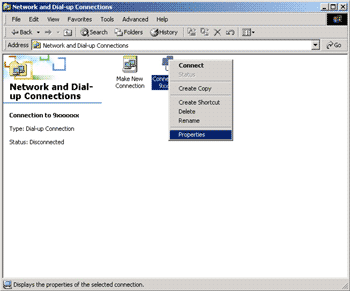
[Step 12:]
- Right-click on the icon for your connection and choose Properties
|
|
|
[Step 13:]
- When the Connection to ISP Properties panel opens, you can see the modems installed on your computer, and thus also the modems you can choose to dial with.
- Select the modem you have just installed, and click on Configure
|

|
|
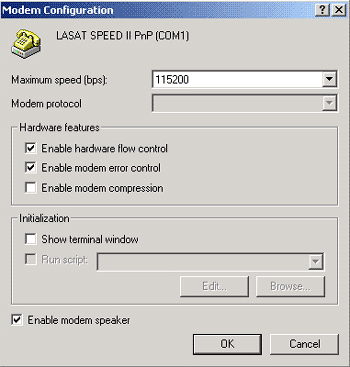
[Step 14:]
- Make sure that Enable Modem Compression is deselected , and that your hardware settings are as below.
- Click OK and close the Connection to ISP Properties panel
|
|
